So the film is officially finished! I never thought I'd see the day, but the unthinkable has happened and we've actually finished the project.
I'm pretty happy with the end result! I think we've all worked really really hard over the last 10 weeks or so and it's been stressful at times, but all very worth it for the end result! The credits were a late addition created by Dave that I think look so cool! And I think it's a great way to show off the effort we all put into the gallery environment too.
I think our idea was quite a unique take on the digital environment brief and I think we've created something quite unique and fun to watch. I've learnt a lot about areas I previously hadn't touched on before this project, particularly lighting and UV mapping which has benefitted my understanding of Maya and industry practice a lot. I think I've developed a lot as an animator as well, because I had had to produce a certain number of shots to a brief and storyboard by a certain date which I imagine is a lot like working within the industry.
So well done to all of Meat and Five Veg!
Wednesday, 12 January 2011

Render: Done. Editing: Almost.
So just a quick update that starts with some good news: everything rendered fine! Dave and Maik have done a wicked job with the rendering and everything's been passed through adrive to James for the editing to being. James has posted a few drafts on the Meat and Five Veg facebook group but everyone has been pointing out certain things they want changed including myself. It's not a personal attack on James in any way at all, but we just want everything to look as good as it can. There were some problems with very strange sound choices, some out of sync noises and there were a couple of shots that got corrupted when they hopped onto adrive which is nobodies fault. I feel bad pointing out things that I'd like changed because I know that editing s no easy task, but I keep telling myself that voicing an opinion is the right thing to do which I know it is, I just still feel bad. But James is putting a lot of effort in as I type and he has been for a while so I'm very confident that he'll produce an edit that we're all pleased with very very soon.
It's done! The animation is all complete and everything has been handed to Maik to being rendering. The reason Maik is taking over rendering, along with Dave, is because there have been some recent problems with the render farm in college, the problem being that it's rendering capabilities have been considerably reduced in the last few weeks. Maik had been looking into buying a computer that was a lot more powerful than his laptop that could take over rendering and heavy jobs in Maya, but hadn't planned on getting it this early. But when we found out that the render farm was playing up, he went ahead and bought it so that we could render off that. That's commitment! And has really saved us in the final hour for rendering, so we all owe him a big thank you. But I'm not giving it to him, because the power will go to his head and we'll have a mutiny on our hands. Anyway, me and Joe and uploaded all our scene files to adrive.com, which have been taken down by Dave and Maik and they are just reapplying textures and lights and then scene 2 and 3 are being sent to render.
Ahhhhhhhhhhhhh. That was my big sigh of relief to have all the animation done. As soon as the rendered shots come out then it's over to James and Malachi for sound and editing.
With the playblasts I've produced I'm attempting to stay as close as I can to the storyboard, just so it reads in a familiar way when it comes to being edited. Below are all the shots I had to do by the 31st of december, which was a target we had set in order to give us a good amount of time to render and edit everything together. I'm pretty happy with the most of the shots I've produced, but too be honest there's not really a lot going on in them so I was never going to think that they were the best thing I'd ever produced. The walk towards the painting I am very disappointed with though, as I just didn't have enough time to polish it and fix some problems in the way I would have liked. I used an old walk cycle test to start the walk off then carried on a few more steps. But it's just really poppy and unnatural and I'm not very happy with it. But on the plus side it's only a short shot and as long as it conveys to the audience that the character is walking up to the painting without them having too much to focus on the mechanics of the walk then I think I'll get away with it. But it's just a lesson learnt for the future I suppose: if one of the shots I have to do is a walk, do it first!
Joe has also been working hard to get all his shots done, and they are coming along really really well, but we;re going to need more time. And it's in no way because of laziness on anyones part, but because Joe is doing the shot where the statue falls down which is one of the biggest in the film and so more time is needed to make sure it's completely perfect, so we've all agreed to extend the deadline to the 2nd of January. I'm going to help out by doing a couple of small shots towards the end of scene two so that Joe's got more time to focus on this shot. But it's all coming together!
Joe has also been working hard to get all his shots done, and they are coming along really really well, but we;re going to need more time. And it's in no way because of laziness on anyones part, but because Joe is doing the shot where the statue falls down which is one of the biggest in the film and so more time is needed to make sure it's completely perfect, so we've all agreed to extend the deadline to the 2nd of January. I'm going to help out by doing a couple of small shots towards the end of scene two so that Joe's got more time to focus on this shot. But it's all coming together!
Okay so while the finishing touches are being put on scene 1 inside the gallery, animation is beginning for scene 2. Myself and Joe have split the shots in half, ad I'll be taking the first half, which happens to fit onto this sheet of Malachi's storyboard:

The next page of the story shows the plans we had for the statue shattering, but there's a big problem with this. The plug-in we need to be able to shatter the statue is really hard to get hold of, both legally and illegally. Dave sent an email to the company who made it enquiring about any possible discounts for students, and they never answered back. And when we searched online for a crack version of it we could only get hold of a windows version, and we're all used macs. This does change the film quite a bit, but we sat round and talked about what we thought we could do without the use of plug-ins that could wrk just as well. After a lot of discussion we decided that the character would again let his curiosity get the better of his and touch the stick holding up the sculpture, which would make it all come crashing down to the floor. As impressive as shattering the thing to pieces would have looked, I think this idea could work well too. It seems a shame to compromise but there's not much else we can do unfortunately, and it's getting quite late in the term for decisions like these to be drawn out and we needed to decide the next step as a group.
So Joe is gonna handle the other half of scene two, and there are only two shots of the film when it returns to the gallery so we'll take one each on that too. Again, I'm going to get going with the animation and post it all up in a couple of days once it's all done.

The next page of the story shows the plans we had for the statue shattering, but there's a big problem with this. The plug-in we need to be able to shatter the statue is really hard to get hold of, both legally and illegally. Dave sent an email to the company who made it enquiring about any possible discounts for students, and they never answered back. And when we searched online for a crack version of it we could only get hold of a windows version, and we're all used macs. This does change the film quite a bit, but we sat round and talked about what we thought we could do without the use of plug-ins that could wrk just as well. After a lot of discussion we decided that the character would again let his curiosity get the better of his and touch the stick holding up the sculpture, which would make it all come crashing down to the floor. As impressive as shattering the thing to pieces would have looked, I think this idea could work well too. It seems a shame to compromise but there's not much else we can do unfortunately, and it's getting quite late in the term for decisions like these to be drawn out and we needed to decide the next step as a group.
So Joe is gonna handle the other half of scene two, and there are only two shots of the film when it returns to the gallery so we'll take one each on that too. Again, I'm going to get going with the animation and post it all up in a couple of days once it's all done.
Tuesday, 11 January 2011
Lighting
So the texturing for scene 1 is done, and scene 2 was textured really quickly by Maik and Malachi. Dave lit most of scene 1 and myself, Joe and Malachi chipped in to light the second scene. As I knew absolutely nothing about lighting I asked Dave for his opinion because he has a lot more experience than me and is pretty good at it. He said that realistically we needed three lights in the scene which was enough for all three of us to do one each. The file was uploaded to adrive.com and I downloaded the file and put my light in first.

It seemed like a good idea to refer back to the painting for inspiration for lighting. The scene was obviously set outside, but it occurred to me that there strong areas of really light and really dark on the statue. The source of the light seemed to be coming from above to the right. Below are a couple of shots of the model Maik created for the scene, which looked utterly spot on! How he's done that I will never know, he said something about NURBS which scared the life out of me so I stopped asking.


I moved the light a lot higher up and only turned the light down a little bit, so it was much more like natural lighting, and below is a screenshot of where the light was placed.


It seemed like a good idea to refer back to the painting for inspiration for lighting. The scene was obviously set outside, but it occurred to me that there strong areas of really light and really dark on the statue. The source of the light seemed to be coming from above to the right. Below are a couple of shots of the model Maik created for the scene, which looked utterly spot on! How he's done that I will never know, he said something about NURBS which scared the life out of me so I stopped asking.


There was a problem though. When I downloaded the scene I just couldn't download all the textures. I don't even know why, maybe a problem within adrive, but me and Maik attempted to fix this problem with no result before decided that we would just have to light the scene without textures. The main difficulty this provided was that when I did mentalray previews of the lighting the sculpture didn't show up. But I applied a white lambert to the sculpture so that it was easier to see which fixed the problem for now.

I started by making an ambient light and placing it directly above the sculpture to see how it would look. It lit the scene fairly well, but I wanted to recreate the same shadows on the sculpture that the painting showed, so I continued messing around with different light types.

This was another attempt at moving around the ambient light from the front.

This was a low intensity area light from behind which obviously is no good because it's so dark!

And this was a spot light from the top that I played around with for a while, but I still couldn't get it to look right. So i decided to go ahead with the ambient light from the top, as I seemed to be much more effective. I tried experimenting with the intensity of the ambient light, and below is a shot in which I set the light too strong.

I moved the light a lot higher up and only turned the light down a little bit, so it was much more like natural lighting, and below is a screenshot of where the light was placed.

This is how it looked after:

This seemed fine for now, and I needed to allow for Joe and Malachi to add more lights so I couldn't make it too bright. However I ran into a problem, which was that I completely forgot how these lights would affect Goon in the scene. The intensity I now had the ambient light set at was far too high, and was lighting Goon really harshly. So I had to turn it down a lot to make sure Goon wasn't being bathed in raw sunlight, and he now looked like this:

More Texturing

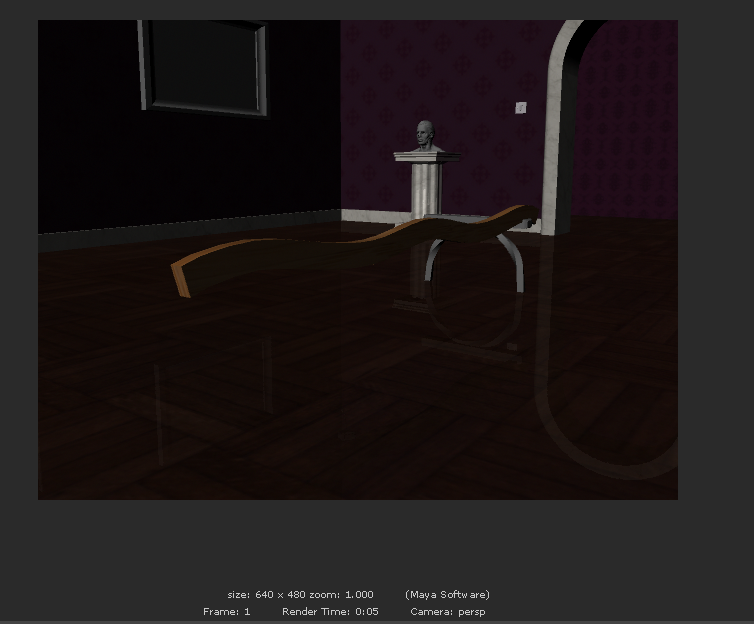
I did the texturing for the bench in the scene in much the same way as the light switch. The bench was modelled by Maik. I automapped the UVs and the came out really squashed which just wasn't going to work:

Instead of matching and sowing the UVs, I stretched them out to roughly the proportion of the bench and applied the wood texture I found from cgtextures.com. It took me a while to organise the UVs because loads of parts were blended into each other which made things a bit hectic. What I did instead was selected all the UV points for the top, bottom and side of the bench and clicked cut UVs. Then I selected "shell" selection in the UV editor and moved all the now separate sections around to get them organised, which then led on to me scaling them to look more like parts of the bench in the UV editor. It sounds easy-ish in words but it got it wrong two or three times before I got it to work.

Again I created a PSD network and applied the wood texture in photoshop which looked like this:

The UVs working much better being stretched out and the bench actually looks pretty good! I only did one of the pieces of wood on the bench and then duplicated them so that the bench was once again complete. Then I clicked all the bench parts and combined them so that it was one object again and it was finished!
Texturing!
We all chipped in to texture the museum scene, as there was plenty to do. The first thing I did was the light switch, which was modelled by Maik. It's hardly the most important object in the scene, but everything has to be textured sooner or later, and I am a complete beginner to texturing. Since the object has no curves whatsoever I went about it by automatic mapping. When it was unfolded, there were a few UVs dotted around that need to be sowed together, particularly the sides of the squares. I selected vertex and clicked on a vertex on the edge of the square so that it would highlight all the vertices it was attached to so that I knew which UVs i need to sow. The final result is shown below:

I'm not going to pretend that I already new how to do this, as I couldn't pick much up from the elctures as I kept getting so lost. So Maik and Dave ran me through the basic techniques of unwrapping which allowed me to get involved with texturing more comfortably. So credit where credit is definitely due, thank you Maik and Dave!
I looked on the internet for a plastic texture for the light. Although they are always flat white in real life, there didn't seem to be a point texturing it if I was just going to paint over the UVs white in photoshop. I found the texture below from deviantart.com. It gave it a bit more of a realistic feel than would a flat white lambert of blinn.

So now that the UVs were unfolded and the texture was decided all I needed to do next was apply it. I created a PSD network and saved it to the sourceimages file. The I opened it in photoshop and dragged the texture over onto layer 1 of the UV snapshot. Resized it, saved it, then applied it as a lambert and the lightswitch was textured!


And here's the final result from mentalray:

Scene 1 Animation Done!
So I've been working on the animation relentlessly to get the shots finished and they're now all finished. I playblasted all the scenes from the angle they will be rendered from and cut the together in after effects to make the video above. Originally the shots didn't read that well, and some things happened twice from different angles. But I trimmed them down and I think they're working quite nicely now! Things are moving along quite nicely now. We're going to start texturing very soon, and a lot of work is happening on the second scene. As soon as we all texture the first scene it's getting lit and rendered. Lovely!
Monday, 10 January 2011
As much as this shot has been a complete pain, it's now done! I had to spend a lot of time looking at the weight of the character and how it shifts as he moves over the rope. It took a lot of observation, and some painful attempts, to understand how it should look. I realised that the leg he's stepping forward with raises first, and the weight is pushed forward by the torso so the body is very briefly in free fall. Then the toes of the back foot push upwards giving the height needed to clear the obstacle, and the front foot absorbs the weight of the fall. The idea is that the character is then so pleased to have stepped over in one piece that he forgets the obstacle when moving his other leg, clips the rope and goes down.
I made the recovery quite snappy to give the character a bit of personality. He knows he shouldn't have stepped over in the first place, so tries to regain his composure quickly before anyone realises what he's done. Though the scene is set when the gallery is shut, there would be other guards on patrol so he doesn't want to get in trouble.
In the next few shots the character becomes intrigued by the painting in front him and attempts to touch it. The painting reacts which frightens the guard, but his curiosity gets the better of him and he touches it again. But as soon as he does the painting sucks him inside and the first scene ends. It sounds fairly straight forward when it's put down in words, but it's gonna take a solid amount of hours to finish. While this is happening, Dave and Maik are setting up the second scene inside the painting. James is doing some lighting tests for the gallery also. The plan is that once myself and Joe finish animating the first scene, we'll all texture and light the gallery together and send the scene to render. Once that's done, animation for the second scene begins while the scene itself gets textured. Then we bring all the files together, light them and render them. Then we'll finish the animation for the scene back in the museum and send that to render, then editing begins and we should be done!
In the mean time, here's the finished shot. I'm not going to post each individual shot up on the blog because it doesn't seem like it has any benefits against finishing all the shots and putting a finished scene one playblast of the animation up once I'm done.
I made the recovery quite snappy to give the character a bit of personality. He knows he shouldn't have stepped over in the first place, so tries to regain his composure quickly before anyone realises what he's done. Though the scene is set when the gallery is shut, there would be other guards on patrol so he doesn't want to get in trouble.
In the next few shots the character becomes intrigued by the painting in front him and attempts to touch it. The painting reacts which frightens the guard, but his curiosity gets the better of him and he touches it again. But as soon as he does the painting sucks him inside and the first scene ends. It sounds fairly straight forward when it's put down in words, but it's gonna take a solid amount of hours to finish. While this is happening, Dave and Maik are setting up the second scene inside the painting. James is doing some lighting tests for the gallery also. The plan is that once myself and Joe finish animating the first scene, we'll all texture and light the gallery together and send the scene to render. Once that's done, animation for the second scene begins while the scene itself gets textured. Then we bring all the files together, light them and render them. Then we'll finish the animation for the scene back in the museum and send that to render, then editing begins and we should be done!
In the mean time, here's the finished shot. I'm not going to post each individual shot up on the blog because it doesn't seem like it has any benefits against finishing all the shots and putting a finished scene one playblast of the animation up once I'm done.
Monday, 6 December 2010
Monday, 29 November 2010
Step-over Playblast
This is a shot that I was stressing out about trying for a while. It took me about three million tries to do the legs, and another four million to do the arms. I just couldn't get them to look right! But the playblast below is the best one I've done:
I think the left knee is popping up a bit too fast, and there are another couple of areas that need some more attention, but I'm much happier with this one and I'm hopefully gonna start polishing soon!
I think the left knee is popping up a bit too fast, and there are another couple of areas that need some more attention, but I'm much happier with this one and I'm hopefully gonna start polishing soon!
Tuesday, 23 November 2010
Shot 1
Shot 1: done. It really upsets me that all the effort I put into cushioning the animation and really subtle moving holds don't show up in the youtube clip above. But at least I know they're there and that they will show up in the final render, so I can sleep at night. The next shot I'm going to work on is the step/trip over the rope. Pretty nervous about this one because it's gonna be tricky. Below are a coupe of videos of me attempting to make something to work from, and looking like a complete idiot at the same time. It has been useful, but I think I'm going to need to sketch this out to understand it more.
This first one was a little extreme, and I was going at it too 'straight on' if that makes any sense. Tried to fix these problems in the second one.
No idea why that's playing so fast but this one actually helped me a lot more. But I didn't know what to do with my hands. I was conscious of not knowing what to do with the hands before I made the video, so I think I forced it a bit when I filmed it. But this is something I can work out when I start sketching poses out, and the video helped me out a lot with the legs. It was really helpful to see that the leg rises first in anticipation of the height of the object, and then the toes push the weight over rope.
Goon Walk Cycle Test
This is just a quick test to see how the rig works. Took me about 2/3 hours to get this much done but it's obviously not polished or anything. The walk itself is pretty vague and doesn't really convey a lot of personality, but was only really meant to test out the technical points of the rig. And to get me back on walk cycles, because after producing about 6 or 7 in year one i was happy to leave them for a while, but ended up forgetting about them completely. Took me a bit of stressing out and thorough read of the animators handbook to get my head around them again, but I got there eventually!
Malakai has worked really quickly and has produced not only a story board but an animatic as well, both of which are really good quality! I've got a much better idea of what I'm going to be animating and how the film is going to flow now.


And here's the animatic:
After talking about it for a while we decided that Joe will be doing the animation up to where the Character walks to the painting, and I will be animating from there until he gets sucked into it. There's a fair amount of tricky stuff in there, especially the shots where he steps of the rope barrier and falls which is going to take a fair amount of research to be able to convey the weight well. But the first shot to be done it the close up of the face reacting surprised to the litter on the floor. It's only a second or so long, but there needs to be a lot of polish on the animation so that it doesn't look boring, so I'm starting that straight away.
Aside from that the museum interior has been finished! Dave and Maik have worked really quickly and we're all really happy with the result:

And here is an early lighting test done by James which I think works really nicely to set the atmosphere of the room. It's also got a roof mock up by James which looks really cool as well:

There's also a much higher poly version of the ropes that Dave has done which looks a bit more realistic:


We've also made quite an important change to the character, in making him a security guard instead of a janitor. We thought that it would fit the piece better if he was a security guard on patrol, because not only would we avoid having to have him cleaning or push a mop around, but we liked the idea of a security guard being bored on a night shift so often day dreams to pass the time. As the whole sequence of being sucked inside the painting gets revealed to be an elaborate day dream, we thought it would fit a lot better. Maik and Dave have added some additions to the character and changed some of his colours to make him a much more authentic character, as seen below:


Modelling List
We sat down today and went through a list of what needed to be modelled, which is a lot. We've got plinths, frames, arched doorways, rope barriers, security cameras, edges and covings, frames, more complicated frames, statues, pots, benches, and more. Scary stuff, but Maik and Dave are confident that they can get most of the low poly models done by the end of the week. After that we sat down with Malakai and spoke a lot more in depth about the storyline and how we which shots we would need to use to be able to push the narrative on effectively.
As the environment doesn't react without the character, it is the character that will be driving the entire film, so we spent some time developing the character himself and what attributes would force him to move around within the environment. The most important thing we decided was how the film was going to end. The character would be walking through a corridor, spot a piece of litter between the rope barrier and the painting and make his way into the room. He steps over the barrier (though trips and knocks it over) and regains composure in time to notice the painting rippling very strangely. To investigate, he touches the painting which causes him to get sucked into it. Once in the painting he is obviously fairly alarmed about what has just happened, but lets his inquisitive nature take over and investigates the structure in front of him. Once the character has had change to take in what is around him, the structure then shatters (yes shatters) and he is shown standing blankly in front of the painting as he was before, when another member of staff snaps him out of his day dream and tells him to get back to work.
It's a lot of work in all areas, but all the more reason to get started straight away. While Dave and Maik continue to model, Malakai is going to begin developing a first draft storyboard. Meanwhile myself and Joe are going to begin with some simple tests on the rig we will be using called Goon:
Hardly my finest piece of animation, but it was just a quick test I did to get to grips with the rig. It's honestly one of the easiest free rigs to use that I've come across. It has a lot of similar features to the Animation Mentor rig Bishop, and all of its controls aren't over complicated. I've also been learning from a book by an animator called Eric Luhta called "How to cheat in Maya 2010". It's a really useful book for animating that breaks down a lot of the techniques used in maya for animating, covering everything from setting projects to polishing and lighting/rendering. And all of its examples are executed using the Goon rig too, which is a massive help. I've already learnt how to refine my animation using moving holds and cushioning etc, so I'm really eager to start working straight away. Going to do a walk cycle test next to get used to his full body controls. Then when Malakai has done a few rough shots we can start allocating different sections for myself and Joe to begin animating to. More coming soon!

As the environment doesn't react without the character, it is the character that will be driving the entire film, so we spent some time developing the character himself and what attributes would force him to move around within the environment. The most important thing we decided was how the film was going to end. The character would be walking through a corridor, spot a piece of litter between the rope barrier and the painting and make his way into the room. He steps over the barrier (though trips and knocks it over) and regains composure in time to notice the painting rippling very strangely. To investigate, he touches the painting which causes him to get sucked into it. Once in the painting he is obviously fairly alarmed about what has just happened, but lets his inquisitive nature take over and investigates the structure in front of him. Once the character has had change to take in what is around him, the structure then shatters (yes shatters) and he is shown standing blankly in front of the painting as he was before, when another member of staff snaps him out of his day dream and tells him to get back to work.
It's a lot of work in all areas, but all the more reason to get started straight away. While Dave and Maik continue to model, Malakai is going to begin developing a first draft storyboard. Meanwhile myself and Joe are going to begin with some simple tests on the rig we will be using called Goon:
Hardly my finest piece of animation, but it was just a quick test I did to get to grips with the rig. It's honestly one of the easiest free rigs to use that I've come across. It has a lot of similar features to the Animation Mentor rig Bishop, and all of its controls aren't over complicated. I've also been learning from a book by an animator called Eric Luhta called "How to cheat in Maya 2010". It's a really useful book for animating that breaks down a lot of the techniques used in maya for animating, covering everything from setting projects to polishing and lighting/rendering. And all of its examples are executed using the Goon rig too, which is a massive help. I've already learnt how to refine my animation using moving holds and cushioning etc, so I'm really eager to start working straight away. Going to do a walk cycle test next to get used to his full body controls. Then when Malakai has done a few rough shots we can start allocating different sections for myself and Joe to begin animating to. More coming soon!

Monday, 22 November 2010
More Research
I think it's about time we go straight for the strangest of the Surreal painters: Salvador Dali, as there is no one better known for creating stuff that is, in all honesty, proper weird. 10 points to the first person who can tell me exactly what this really is:

I do however really really like his work! I studied him a lot over my two years in A-Level art and influences from him were extremely common in a lot of my projects. As I said with MC Escher, I think it is amazing that he was able to put these impossibly strange structures down on canvas, as most people would have trouble even conjuring up something like this let alone being able to perfectly visualise it.


The complete lack of recognisable structure makes Dalis work perfect for our project. It's got its link back to reality and a dream like state of creation that makes his work the perfect example of Surrealism and a strong contrast to the interior structure of the museum. When I ran this by the group they had also taken a really strong liking to Dalis work, and together we looked throgh a really comprehensive collection of his paintings online called VirtualDali.com and we decided on the painting below:

"Atavistic Vestiges After The Rain". We decided on this because it has the best features of a lot of Dalis paintings in it, and ones that are very appropriate to the project. For starters it is set in a strange, unfamiliar open landscape, with the low horizon complimenting the height of the giant, water-like statue being held up by a stick and a rock. The statue is a really unconventional shape and the whole painting has got a really strong dream-like feel to it, which everyone thought was a really strong feature.
So it's finally decided! Time to finalise the storyboard, get modelling, and get animating!

I do however really really like his work! I studied him a lot over my two years in A-Level art and influences from him were extremely common in a lot of my projects. As I said with MC Escher, I think it is amazing that he was able to put these impossibly strange structures down on canvas, as most people would have trouble even conjuring up something like this let alone being able to perfectly visualise it.


The complete lack of recognisable structure makes Dalis work perfect for our project. It's got its link back to reality and a dream like state of creation that makes his work the perfect example of Surrealism and a strong contrast to the interior structure of the museum. When I ran this by the group they had also taken a really strong liking to Dalis work, and together we looked throgh a really comprehensive collection of his paintings online called VirtualDali.com and we decided on the painting below:

"Atavistic Vestiges After The Rain". We decided on this because it has the best features of a lot of Dalis paintings in it, and ones that are very appropriate to the project. For starters it is set in a strange, unfamiliar open landscape, with the low horizon complimenting the height of the giant, water-like statue being held up by a stick and a rock. The statue is a really unconventional shape and the whole painting has got a really strong dream-like feel to it, which everyone thought was a really strong feature.
So it's finally decided! Time to finalise the storyboard, get modelling, and get animating!
Further Painting Research
Another artist associated with Surrealism is Rene Magritte. His work again plays with the themes of reality, which led him to produce a number of thought provoking images that are designed to make the audience more sensitive to their surroundings.
When Magritte was 13 his mother committed suicide by drowning herself in a nearby lake, this being the third or fourth time she had attempted to take her own life over as many years. Though it has recently been questioned, researchers have said that Magritte was present when his mother was found dead and that her dress was covering her face, which could be a reason that he so often obscures the face in his work, as seen in the paintings below:


Though they are very interesting, these paintings are not why Rene Magritte stood out at me as a strong possibility to work from for the project. He also produced a lot of work around strange impossible environments like the paintings below:


I thought these images were pretty cool and could be a great place to work from and maybe a develop an idea in the style of these pictures. I also thought that the picture below could be really cool to work from also. I know that it is still set in an area based firmly around geometric objects, but I thought that on a very simple level this painting would be an amazing environment to move around in 3D, with all the figures on different levels being completely still in free space:

Despite being quite interested in Magritte's work I still didn't think it would fit the project that well. I'm just not getting that warm fuzzy feeling.
When Magritte was 13 his mother committed suicide by drowning herself in a nearby lake, this being the third or fourth time she had attempted to take her own life over as many years. Though it has recently been questioned, researchers have said that Magritte was present when his mother was found dead and that her dress was covering her face, which could be a reason that he so often obscures the face in his work, as seen in the paintings below:


Though they are very interesting, these paintings are not why Rene Magritte stood out at me as a strong possibility to work from for the project. He also produced a lot of work around strange impossible environments like the paintings below:


I thought these images were pretty cool and could be a great place to work from and maybe a develop an idea in the style of these pictures. I also thought that the picture below could be really cool to work from also. I know that it is still set in an area based firmly around geometric objects, but I thought that on a very simple level this painting would be an amazing environment to move around in 3D, with all the figures on different levels being completely still in free space:

Despite being quite interested in Magritte's work I still didn't think it would fit the project that well. I'm just not getting that warm fuzzy feeling.
Subscribe to:
Posts (Atom)